
My interest in photography started in my teens using film cameras, developing and printing – ‘Old School’, I suppose. However, I took to digital because you could see your pictures straightaway and taking them didn’t cost anything. Cameras, image processing and printing technology now are bogglingly good. However, editing software has moved on at pace and the more I see of it, the more I am beginning to feel ‘Old School Digital’.
The buzz word today is AI, so must I embrace it, or what? The editing in Photoshop I’m familiar with is like driving a car – I am in control. Any mistakes are my fault. AI is like riding a horse. You have some control, but it has a mind of its own and I am not sure I am comfortable with it.
We saw several examples of AI processing this evening which was spent looking at pictures offered by some members offered up for processing by others. Six members agreed to do the editing and demonstrate why and how they arrived at the final image.
I will start with a picture from Brian that Chris had sent to three other members to edit as it lets us compare three different approaches. It was a landscape taken from a point on the Kirkstone Pass in Cumbria looking down on Patterdale and Brothers Water. Kirkstone Pass is a narrow winding road about 4 miles long, flanked by drystone walls with gradients of up to 1 in 4. It is notorious for drivers losing control and crashing into the walls.
First up was Chris R who used a Photoshop plug-in, TK8. So the Photoshop screen didn’t look at all familiar to me, taken up as it was by the mass of tool icons of TK8. It was supposed to make Photoshop easier to use. Being Old School Digital, I was completely baffled by it and think I’ll stick with PhotoShop as it is.
TK8 was developed by Tony Kuyper and designed to utilise luminosity masks, a feature not offered currently in Photoshop. As I understand it , luminosity masks allow you to make adjustments to specific tonal ranges in the image, but don’t quote me on that. If you are interest, please consult one of the aficionados in the club to help you out.
Chris replaced the sky with one of his own, then cropped top and bottom off the picture. This is his final edit compared with the original.

I made the point that although clouds vary in shape and size, they still obey the laws of perspective. I remember my art teacher at school, Vic Gee, drawing something like this on the blackboard to illustrate it. So if you want to drop a sky in behind a landscape, don’t use a sky that you took pointing the camera upwards. It may not look convincing.
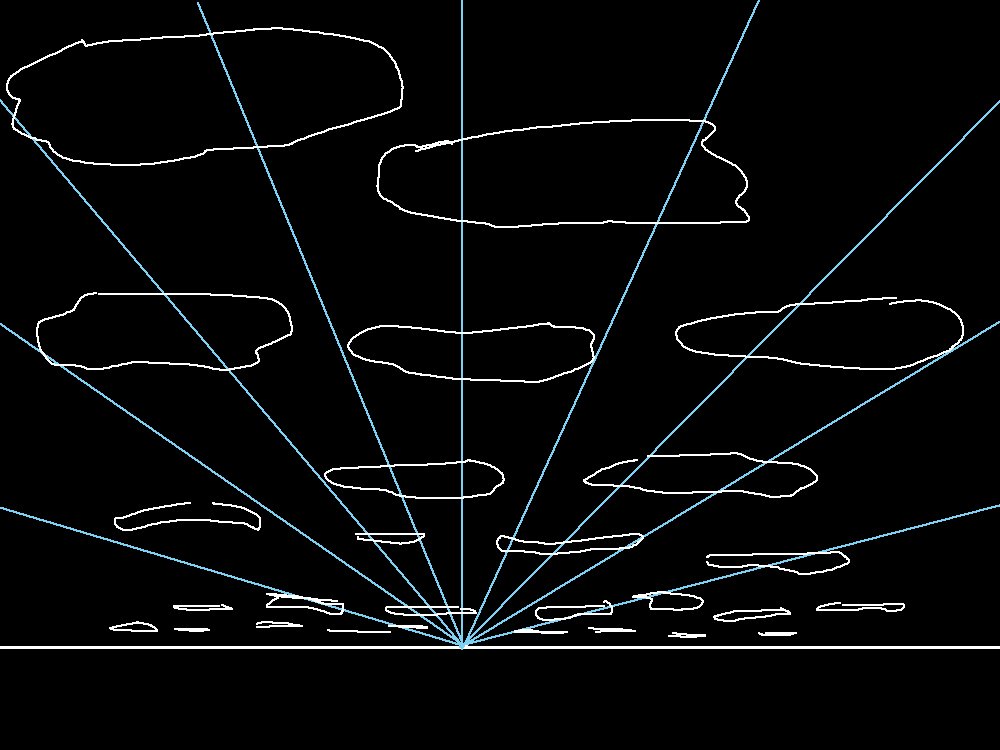
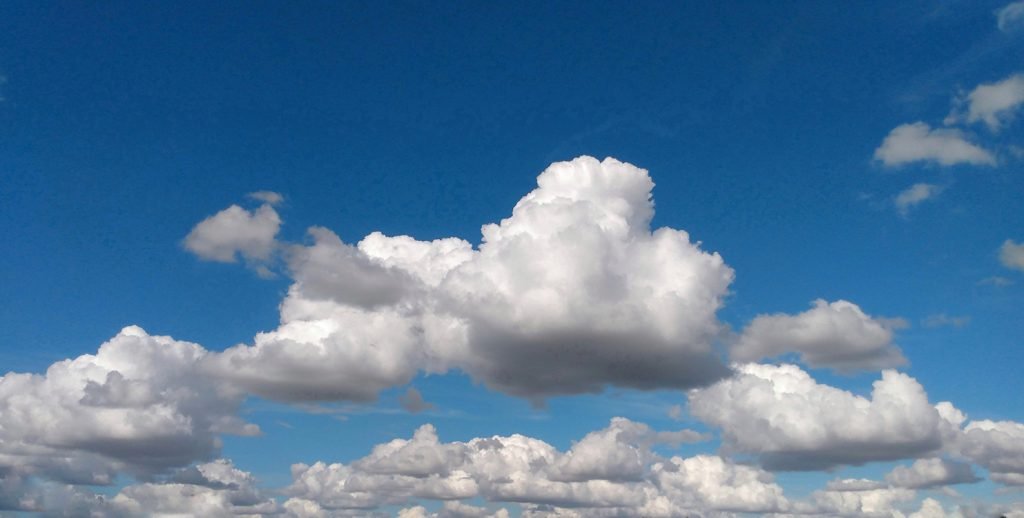
Philip has just provided me with a cloudscape from Wiltshire which illustrates it a lot better than my scribbling. Thank you Philip.
Then David A showed his version edited in Lightroom and went through the numerous steps used to achieve the final result.
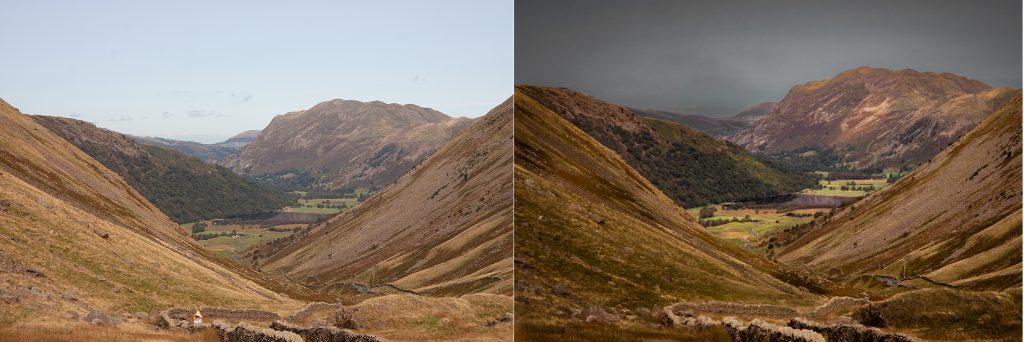
David darkened the sky and the landscape making it look like the weather conditions more typical of the Lake District. He also cloned out the road sign (which says 13% Keep in Low Gear).
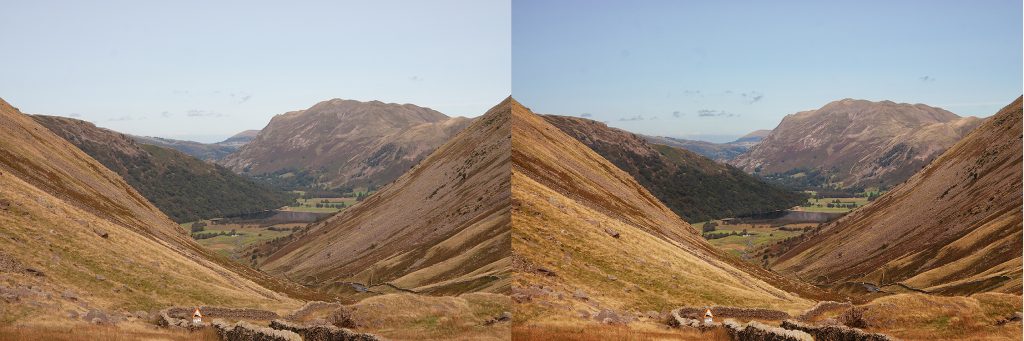
Finally, David P showed his version. For me this was not any old landscape, it was the Kirkstone Pass, and I didn’t want to lose the sense of place. The lighting was bright but flat, so I used Curves adjustments to increase contrast separately in the sky and land. Then I used a Dodge/Burn layer for local contrast adjustments, particularly on the drystone walls of the Pass. I felt that this lead-in, and the road sign, were important parts of the image.
So what do you think about the edits? We would all like to know your opinion so please leave a comment on the blog.
Brian showed how he had used Lightroom to edit two images that he conceived as monochrome conversions. He went through many editing steps in the colour image before making the mono conversion. I always make the mono conversation early on because generally there is a big change in tonal balance once the colour is removed, so his approach seemed counter-intuitive to me. But who am I to say? Both his conversions produced very effective monochromes.

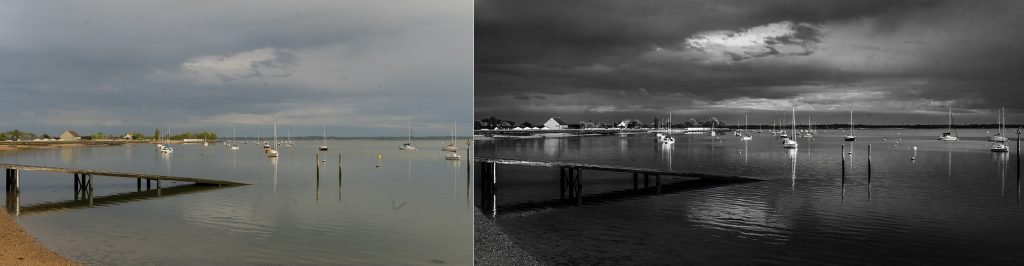
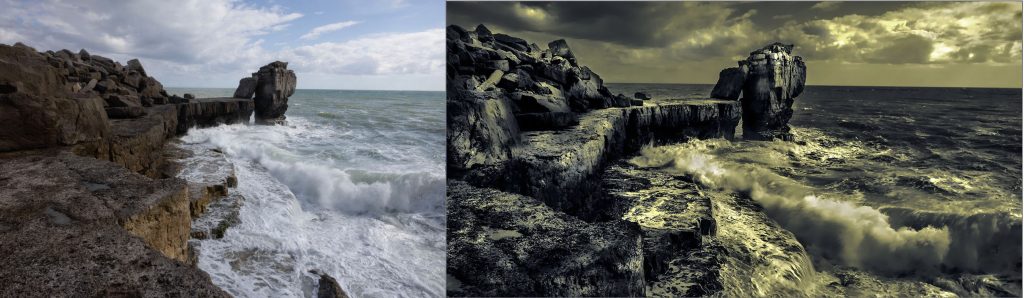
Alfred had been presented with a coastal seascape which he converted to a toned monochrome version barely identifiable from the original. Like me, Alfred started printing black and white in the darkroom in which he developed the skills in printing that inject the contrast adjustments needed to produce the really dramatic changes that inject life into a monochrome. Unlike me, he has carried this skill into his editing of digital images. New School Digital?
He has kindly sent me some notes on the processes and software he used:
I used Lightroom 5 for the changes to the given image, using only the adjustment brush along with exposure and setting the dark and light points. Steps –
- from Lightroom no adjustment for noise or sharpen
- Denoise basic noise reduction using “Denoise” software
- Denoise sharpen basic automatic sharpen with polarizing effect
- Denoise sharpen polarizing effect with additional fine sharpen.
All these effects were made with a single click selection, so no use of sliders for personal choice.
The Denoise and Sharpen software was from German company FRANZIS.
I have other software from this company, all work well. The Denoise software has been compared to Topaz – see Youtube.
I haven’t paid more than 20 euros for any of their software. They bring out updates frequently so I buy the older versions.
Last month I bought Silkypix Developer Pro 9 for 20 euros reduced from 234 euros – haven’t tried it yet but looks very comprehensive.
Thank you for that Alfred.
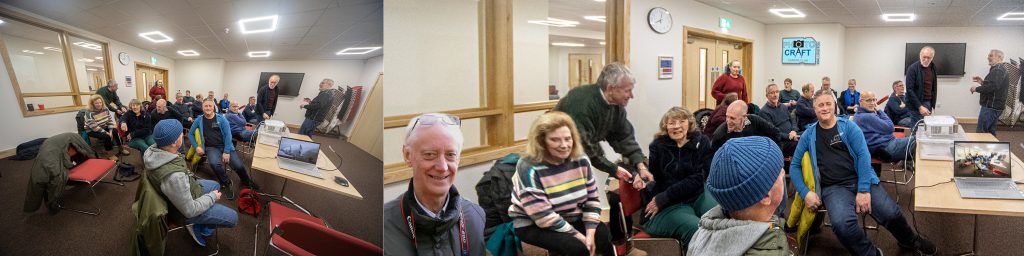
The final edit for the evening was the picture I took, and included in my last blog, of our first evening at St Patrick’s, edited by Dave S. The photo was taken with a 12 mm lens to get everyone in. Dave tried to straighten the verticals using the Distort tool in Photoshop. This worked on the verticals but distorted everything else so Dave spent some time reshaping the heads of some members to make them look more normal, and he moved Geoff bodily. I do appreciate that he had refilled my empty chair with a picture of me he had got from somewhere. Brian’s laptop now shows a copy of the room we were in and a nice Photocraft plaque was added to the wall. A lot of fun Dave – we would expect nothing less from you.
I think the organisers of this event panic that nobody will want to contribute and that this kind of evening will fall flat through lack of support. They should feel reassured. This has never happened, and I don’t think it will. People are always willing to participate in these interactive events which are always fun and interesting. All I would say is that the balance of evenings like this would be improved if anyone participating is asked in advanced how much time they think they will need and that the host reminds them when they are getting close to this limit.

Thanks Diddy. For me, I took the Kirkstone Pass image to show the sign and the road as they are the start and the lead in to the overall photograph.
As for AI, I think someone on wednesday did say that it can be used just as a starting point. I fed feel like that. I’m rarely going to just click on something and then say “finished”. There are also other options in the AI software that are about to the user to ensure the final outcome is a personal one rather than a algorithm produced one.
Fat fingers and using a mobile to comment are not a good combination!
My AI comment should read as follows:
As for AI, I think someone on Wednesday did say that it can be used just as a starting point. I feel like that. I’m rarely going to just click on something and say “Finished”. There are always other options available in AI software that allow the user to ensure the final outcome is a personal one rather than an algorithim produced one.
Thank you for your interesting comments Brian. I have made a couple of changes to the blog, correcting the misattribution of TK8 to Topaz that you pointed out, and saying a little more about TK8. I also corrected the spelling of Geoff’s name. Sorry about that Geoff.
Perhaps I am also ‘old school digital’ but it does seem that recent software developments are taking away some of the post production skills of the photographer by relying on such technology and the presets of others to do the job. I recently experienced having one of my pictures, upon which I had spent much time and effort. presumed by the judge to have been largely achieved by the press of a button, no doubt contributing to its low score! With AI and other presets becoming more commonly used, perhaps such assumptions will become more frequent!
Good points Dave. Of course, judges have long been making assumptions about what is in front of them but with AI now seemingly intervening in all aspects of photography, it strikes me that a judge could quite simply ask if they are unsure.
I too will be making sure most of my editing is done by me rather than just letting a database decide. AI has its place with sharpening and noise reduction but how an overall look is chosen is surely something that the photographer should decide rather than something plucked literally from the ether.
Thank you for your comment Dave. I hope you don’t reach a stage when you think it just isn’t worth the bother. We did years ago when we got into using early printing processes like gum bichromate, cyanotype etc. These involve hand-coating watercolour paper with sensitiser and exposing it in contact with an enlarged negative. A considerable effort to get right but we soon realised that judges at club competition level were not likely to recognise what they were looking at and assume it an attempt at digital manipulation that hadn’t worked. Hello Brave New World..