As a blogger you will have access to the Admin tool bar when logged-in to the website. The thin tool bar across the top of the page.
To start a new blog, on the tool bar click on new and select post.
Setting up your post environment
The first time the post editor window opens you may see the ‘Welcome to the block editor”, either click next to read the info or click on the X in top RH corner to exit.
The website uses Divi builder to create the elements within the website, with the exception of creating posts for the blog. The default editor must be used. If the ‘Build your lay out using Divi’ is displayed select ‘Use default editor’
The last piece of set-up is to provide a clean page. Click on the options – three vertical dots in top RHS, select Preferences at bottom of the open panel. If the panel is blank click anywhere in the main screen area and try again. In the Preferences panel, under additional turn off: custom fields, Extra settings, and UM content restriction. As you turn each off the screen will clear down. Click the X to close preferences, click the three vertical dots and ensure that Post is underscored, if not click on Post.
Writing the post
- Add a title for your post by clicking on ‘ADD TITLE’
- To add content clicking on ‘Start writing
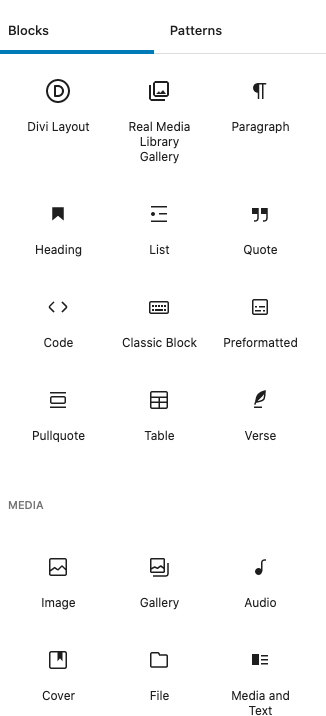
- Click on the plus sign in the blue button at the op will open additional formatting options as seen on the left.
The process is very similar to what was on the Wix system.
Note: The blog editor will default to a new paragraph each time the ‘enter’ or ‘return’ button is pressed.
Creating a list without preceding numbers or bullet points will result in a new paragraph for each line. To overcome this limitation select the blue + button and select classic block. In the classic block editor change from paragraph to preformatted and start writing
One
two
three
Four
Highlighting the text and changing back from preformatted to ‘paragraph’ will result in larger line spacing but less than the blog editor paragraph format.
Example of Quoted Text
Note: To optimise the performance of the website all images must be optimised, any images found in the media library are optimised. To optimise an image before uploading use tinyjpg.com. An easy-to-use website, upload or drag & drop an image onto their website page. When optimisation completes down the image to your computer.Save the post as a draft and preview the post using the Preview button on the post tool bar. The preview of the post will open in a new tab.
Adding an image
- Add an image – select blue + button top RHS and select image
- Options to select upload an image or one from the media library
- Select media library – the media library will open and display all images
- Top LHS select a folder from the dropdown to filter the images
- Inside the folder, select image and press the blue set featured image button

The size of the image can be adjusted using the controls in the panel on the LHS. If the panel is not visible click the settings icon (button next to blue update button).
The image block must be selected to enable the panel image sizing options. The image dimensions can be altered to a specific size or set to 25, 50, or 75%of full size.
Website Performance
To optimise the performance of the website all images must be optimised, any images found in the media library are optimised.
Images must be optimised before being uploaded on to the website. To optimise an image before uploading use your own method of choice or alternatively, use tinyjpg.com. TinyJPG is an easy-to-use website. Upload or drag & drop an image onto their website page. When optimisation completes, download the image to your computer.
Key things to do to complete the post.
- Assign the post to a category – click on the categories dropdown on the Post panel on the RHS
- Add a featured image – select featured image,
- select upload media library – the media library will open and display all images
- Top LHS select a folder from the dropdown to filter the images
- Inside the folder, select image and press the blue set featured image button
Clicking on the WordPress logo will open the post page where you have access to all of your posts.


0 Comments